|
1953 Dwight D. Eisenhower The existence of this process set was debated for many years. It had been featured on the cover of a 1960s era Medallic Art Company catalog and once in a COINage article on inaugural medals. These two appearances aside the whereabouts of the actual set was not known. Every one we asked felt the medals were probably laid out during production for a quick photo op and then returned to the line. However, after the passing of a former Medallic Art Company employee this set emerged in an auction of his medallic holdings. It now resides in the Coin-n-Medal Collector's Asylum collection! |
||
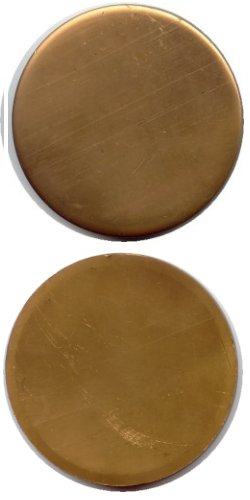 |
Stage 1 The bronze alloy is first mixed and cast into ingots. The ingots are then repeatedly rolled under great pressure forming sheets of bronze of the proper thickness. These sheets then have individual blanks punched from them cookie-cutter style. You can tell which side of the planchet was facing up by the deformation of the metal along the edge as it is sheared from the sheet. This process does not differ tremendously from coin production. It is a little less automated in that several blanks are not punched at once. Just one at a time. However, the biggest difference is that the edges of the punched blanks are not further formed before delivery to the press room. In medal striking the repeated application of the power of the press will be used to form the rim! Before the planchets are delivered to the press they are washed and annealed (softened) in preparation for striking. |
|
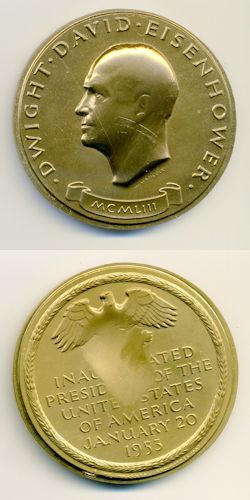
Stage 2 After the planchets have been washed and annealed they are ready to receive an impression. Even today's large modern presses cannot bring up such an intricate high-relief design in a single blow. The results of the first blow leave the medal recognizable but somewhat mushy. The dies force metal to flow out of the low areas of the design and into the high areas. On the obverse the metal flow is from the fields inward toward the central bust and outward toward the rim. The reverse being flatter shows flow from the center outward. It even appears a special die may have been used as the reverse is pushed in opposite the bust on the obverse. Even with this assist the bust details especially the President's ear are very weak. The medal is also struck without a collar. This allows metal to be pushed out (flow) from between the dies at the edge. This practice is typical of large medals. The flange thus created is called "flash." This example shows the results of the first striking. That could represent multiple blows of the dies. The planchet goes through heating and cooling cycles between each blow. This thermal action results in work-hardening which reduces the effect of each strike until the partial completed medal needs to be annealed again. |
 |
|
 |
Stage 3 As stated above, the movement of metal under the tremendous pressure of the press causes the planchet to work-harden. This work-hardenning makes additional strikes futile unless the medal is again annealed. Bronze is annealed by heating it in a furnace and then quickly cooling it by immersing it in water. Interestingly, this same process is used to harden the steel dies. Now annealed and soft enough to strike again the partially completed medal is carefully aligned between the dies for a second series of striking. For this medal (or at least process set) this second striking session is enough to bring up the full detail. The total number of striking sessions required for any art medal can vary from two to a dozen or more depending on the relief of the design. However, this second striking brings up the full detail leaving a proof-like finish on our subject medal. Also notice that the flange or "flash" from having been struck without a collar is very prominent at this point. This is evidence of the tremendous amount of metal movement generated by the just these two strikings. The medal now leaves the press room for the last time - the next stop is the finishing area. |
|
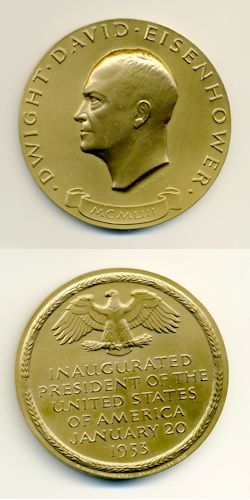
Stage 4 Fully struck up, our medal now enters the sizing and finishing stage, which has no parallel in coin production. First there is the trimming or sizing step in the process. The medal shown here was mounted on a turning lathe in soft keys that mimic the design to protect it from damage. It was then machined to the proper diameter removing the flange or "flash" created in the striking process. The machining operation has left the edge square and one can sometimes even see the fine groves left behind. With a square flat edge the next step is the application of the edge lettering identifying the minter, metallic composition (fineness in the case of silver medals) and appropriate copyright information. |
 |
|
 |
Stage 5 The next step is sandblasting which is a high pressure pelting of the entire surface of the medal with tiny grains of sand. Today, modern methods known as media-blasting employs other abrasives such as baking soda, walnut shells or glass beads. This is done for two reasons. The first is to mute the proof-like surfaces of the medal. The second is to prepare it for the antiquing process. Most bronze, as well as silver, medals are marketed with an antique finish and this one is no exception. The "secret sauce" utilizes the tiny pits left by the sand impacts to embed into the surface and enhance its final appearance. |
|
Stage 6 To achieve this "antique" or " oxidizing "effect the medal is first coated with a solution designed to darken and highlight the lower elements of the design. Each mint or manufacturer has its own "secret recipe" for oxidizing or antiquing the surfaces of their medals. Whatever "recipe" used a finisher would then have removed the solution from the high points and adjusted the effect before the solution dried. Timing is critical at this stage as the longer the time the darker the color and the more difficult it becomes for the finisher to manipulate it. Many process sets allow the solution to dry on one example of the medal for illustration purposes. Medallic Art choose not to do so in this set. After the finisher removes or "relieves" the dark color from the high points and background using a powered buffing wheel leaving color only in the crevices and recesses the medal takes on a "two-toned" appearance that further highlights its sculptural detail. This handwork does give each medal a slightly different look but is amazingly quite consistent. The medal is then washed, dried, and baked to remove all moisture before finally being lacquered to protect the bronze from fingerprints and tarnishing. The medal is now complete! |
 |
|
|
|
||