|
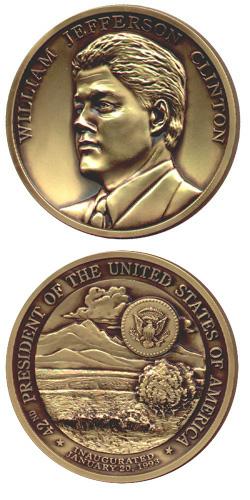
1993 William Jefferson Clinton
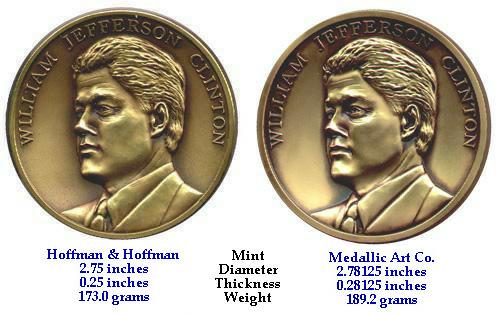
The firm of Hoffman & Hoffman in Carmel, California struck the official inaugural medal for the 1993 inauguration of Bill Clinton. However, the process set was produced much later and by the Medallic Art Company then of Sioux Falls, South Dakota. The chairman of the 1997 Medals Committee requested four process sets from Hoffman & Hoffman to illustrate to the committee the steps required to produce an inaugural medal. Hoffman & Hoffman declined the order for the process sets. Medallic Art Company was then contacted and an order for four processes sets in bronze and one set in silver was placed. The dies, which were in possession of the inaugural committee, were shipped to Medallic Art Company and the process sets were produced. The Medallic Art Company medals differ slightly from the original Hoffman & Hoffman issues. They are slightly larger in diameter, thicker, and the look of the antique finish also differs. |
||
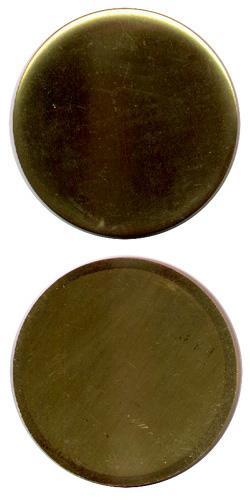 |
Stage 1 A planchet of considerable thickness is required for a high relief medal in order to accommodate the massive amount of metal movement and multiple strikes it will take to bring up the design. To produce these planchets the alloy is first cast into ingots, which are in turn rolled under great pressure in to sheets or strips of the proper thickness. It is from these sheets that the individual blanks are punched. The individual blanks for this medal were punched one at a time from strip stock of commercial bronze, which contains between 90 to 95% copper, with the remaining 5 to 10% being zinc. This blank is 2.75 inches in diameter, 0.25 inches thick and weighs 209.1 grams. You can tell which side of the planchet was facing up by the deformation of the metal caused along the edge as it is sheared from the strip. The mark left by the hydraulic ram that presses the blank through die or hole in the blanking machine is clearly visible on the bottom image. This process differs from coin production only in that the blanks are punched one at a time instead of several simultaneously. At this point the blank is ready to be washed, annealed and delivered to the press operator. Coin blanks on the other hand would require one further operation, edge raising or forming, before they would be delivered to the pressroom. |
|
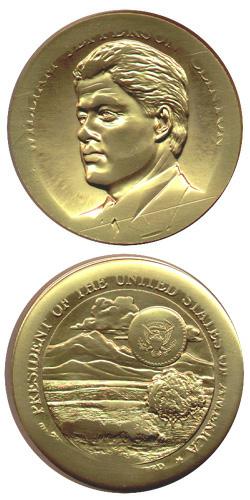
Stage 2 After the blanks or planchets have been washed and annealed (softened) they are ready to receive an impression from the dies. Even today's large modern presses can not bring up such an intricate high-relief design in a single blow. The results of the first blows leave the medal recognizable but the detail very mushy. The dies forced the metal to flow out of the low areas of the design and into the high areas. Due to the design of this medal the metal on the obverse wants to flow from the field around the portrait in toward the President's bust and out toward the edge were a rim will be eventually formed by the die. On the reverse the majority of the metal movement is toward the rim although some of the higher points of the intricate design have not yet been completed. This movement of metal generates great heat, which under the tremendous pressure of the press causes the planchet to work-harden. This work-hardening makes additional strikes fruitless until the medal is annealed again. |
 |
|
 |
Stage 3 Bronze is annealed by heating it in a furnace and then quickly cooling it by immersing it in water. Interestingly this same process is used to harden the steel dies used to strike the medal. After annealing, the medal is carefully aligned between the dies for a second striking. More and more detail is brought up with each blow; but note how, in subsequent stages, the detail is completed first in the center of the medal and the how the lettering around the periphery and the large rim are the last things to be formed as the metal is forced up and out at the edge. This medal, unlike a coin, is struck without a collar. This method is typical of medal production and at this stage you can see a flange, called "flash" starting to be squeezed out from between the obverse and reverse dies. Although the pictures cannot show it the flash is formed much closer to the reverse indicating that the obverse die is much deeper. The sides of the obverse and reverse dies help dam the metal flowing outward and force it up into the raised rim being formed. |
|
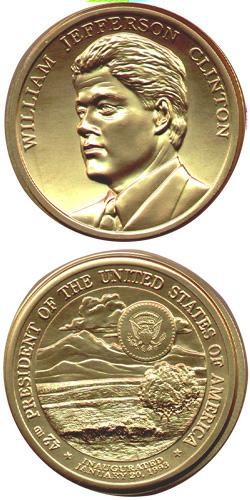
Stage 4 After another trip to the annealing room the medal is ready to receive its third striking. Aligning the medal with the dies becomes easier with each successive striking due to the fact it becomes somewhat self-keying. The third striking brings up even more detail as metal flows from all parts of the surface into cavities in the dies. For this reason areas of high relief are not usually designed back-to-back on coins since they are required to "strike up" in a single blow of the dies. This however is not a problem for a thick planchet high-relief art medal where multiple round trips between the annealing room and the pressroom does not pose a problem. The Clinton medal at this point has full detail in the center of both the obverse and reverse and the rim is weak and very low but clearly defined. It will take one more round trip to the annealing furnaces before the rim is completed and the medal fully struck! |
 |
|
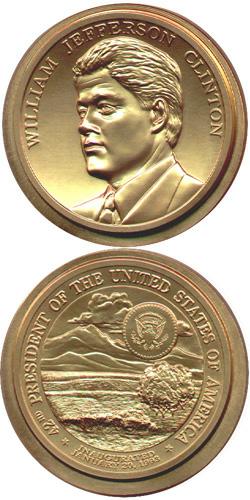 |
Stage 5 Annealed once more the medal is struck for the fourth and in this medal's case final time. The total number of strikes required for any art medal can vary from two to a dozen or more depending on the relief of the design. However, this fourth strike finally brings up the full detail leaving a proof-like finish on our subject medal. The rim detail, which was the last design element of the medal to strike up, is now bold and complete. Also notice that the flange or "flash" from having been struck without a collar is very prominent at this point. This is evidence of the tremendous amount of metal movement generated by the four strikings on the powerful art medal press. The medal now leaves the pressroom for the last time. However, unlike a coin it is not finished. |
|
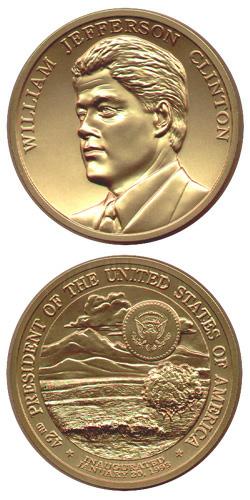
Stage 6 Our medal now enters the sizing and finishing stage, which has no parallel in coin production. This stage actually represents multiple steps in the manufacturing process of an art medal. First, the medal is mounted on a turning lathe in soft keys that mimic the design where it is then machined to the proper diameter removing the flange or "flash" in the process. The flash on this medal is considerably closer to the reverse than the obverse and approximately 1/8-inch thick and protrudes out from the edge by a varying amount. On some medals after the flash is removed you can see the fine groves left behind by this machining operation. Typically the edge lettering identifying the minter, metallic composition and appropriate copyright information is applied next. However, this medal did not receive any edge markings. Then it is sandblasted which is a high pressure pelting of the entire surface with tiny grains of sand or glass beads to mute the proof-like surfaces. Some medals are lacquered at this point and readied for sale; however, ours like most has one more step. |
 |
|
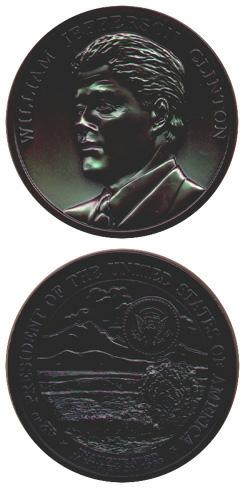 |
Stage 7 Many bronze as well as silver medals are marketed with an antique finish and this one is no exception. To achieve this effect the medal is first coated with an oxidizing solution designed to darken and highlight the lower elements of the design. Emulsion in ammonium sulfate for only a few seconds to give it its dark color is one technique used however I do not know if this is how Medallic Art Company antiqued this medal. Whatever method is used a finisher would then have removed the solution from the high points and adjusted the effect before the solution dried. Timing is critical at this stage as the longer the time the darker the color and the more difficult it becomes for the finisher to manipulate it. The solution was allowed to dry on this medal for purposes of illustrating this step in the process. |
|
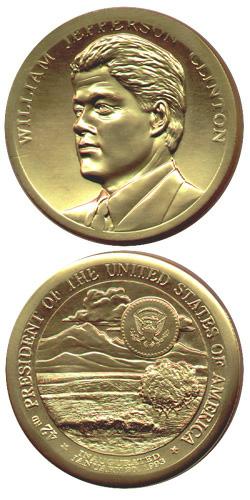
Stage 8 After the finisher removes or "relieves" the dark color from the high points and background using a powered buffing wheel leaving color only in the crevices and recesses the medal takes on a "two-toned" appearance that further highlights its sculptural detail. This handwork does give each medal a slightly different look but is quite consistent. However, the differences in the finishing style on this medal produced by Medallic Art Company does give it a different look from the medal's produced by Hoffman and Hoffman. The medal is then washed, dried, and baked to remove all moisture before finally being lacquered to protect the bronze from tarnishing. The medal is now complete! In it's final state it is now 2.78125 (2-25/32) inches in diameter and it measures 0.28125 (9/32) inches thick at the rim. The maximum relief measured from the highest point on the reverse (the clump of trees) to the highest point on the obverse (the rim) is 0.31 inches or just under 5/16 of an inch. The President's likeness on the obverse stays below the protective rim and the trees and grain on the reverse rise above the protective rim by less than 1/32nd of an inch. Its weight has been trimmed to 189.2 grams almost 20 grams or 10% less than the original 209.1 gram blank it started from. How much does this differ from the Hoffman and Hoffman produced medal? Well, the Medallic Art Company version is 1/32 of an inch larger in both diameter and thickness than the Hoffman medal. It also weighs 16.2 grams more than the Hoffman medal, which weighed in at 173 grams. Much work and craftsmanship have gone into this medal and it now only requires packaging and home. |
 |
|
|
Side-by-Side Comparison
|
||